COPYRIGHT © 2022 NingBo COFF Machinery Co., ltd. ALL RIGHTS RESERVED
Menu
Categories
Welcome to the world of brewing! Transforming your home into a brewing haven starts with the right brewer supply. Whether you’re a seasoned brewer or just starting, having the essential brewer supply can make all the difference. Imagine crafting your own unique flavors right at home. With a minimal investment, you can set up a basic homebrew station. Dive into the art of brewing and discover how the right brewer supply can elevate your brewing experience. Let’s embark on this flavorful journey together!
Key Takeaways
- Start your homebrewing journey with essential equipment like a brew kettle, fermenter, and bottling tools to ensure a smooth brewing process.
- Understand the importance of ingredients: malt, hops, and yeast are crucial for flavor and quality, so choose wisely based on your desired beer style.
- Maintain cleanliness and sanitation throughout the brewing process to prevent off-flavors and contamination, ensuring your beer tastes great.
- Experiment with advanced techniques like dry hopping and barrel aging to create unique flavors and enhance your brewing skills.
- Join a homebrew community to share experiences, gain insights, and find support as you navigate your brewing journey.
- Keep detailed records of your brewing process to replicate successful batches and learn from any mistakes.
- Invest in quality supplies from trusted brands like COFF to elevate your brewing experience and craft exceptional beer.
Essential Brewing Equipment
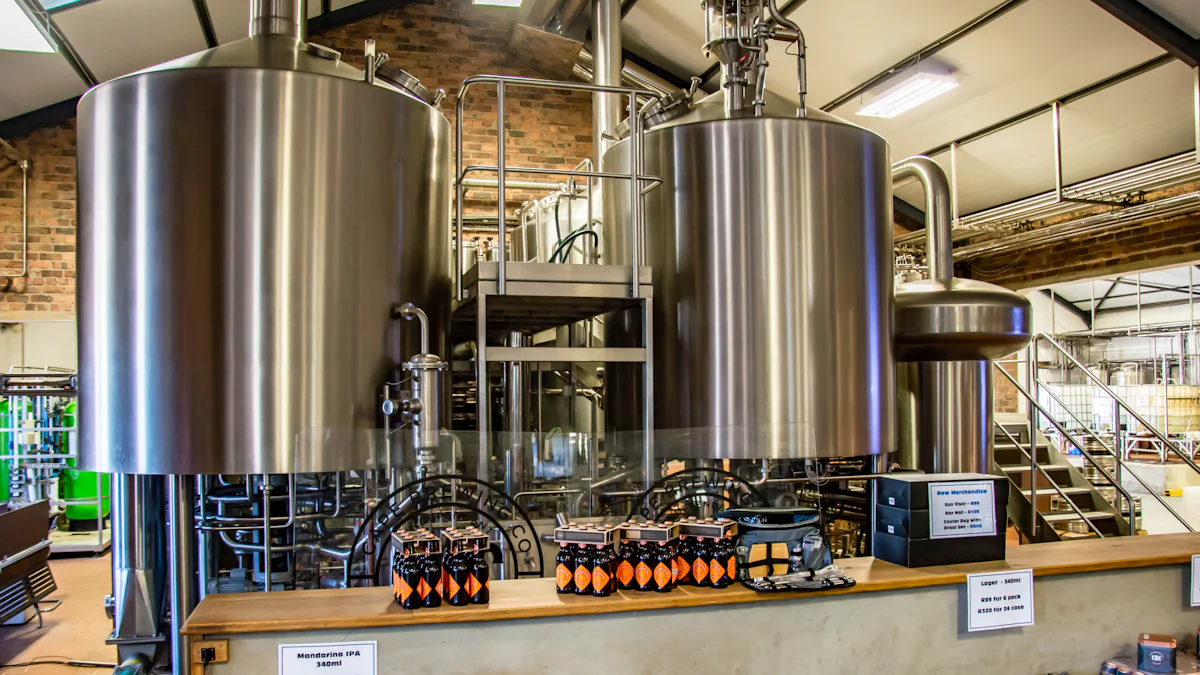
Setting up your homebrew station starts with gathering the right brewing equipment. Let’s dive into the essentials you’ll need to get started.
Brew Kettle
The brew kettle is the heart of your brewing process. It’s where the magic begins.
Choosing the Right Size
When selecting a brew kettle, size matters. Consider how much beer you want to brew at once. A 14-gallon kettle is a great choice for most homebrewers. It provides enough space for a full boil, reducing the risk of boil-overs. If you’re just starting, a smaller kettle might suffice, but remember, you might want to scale up as your skills grow.
Material Considerations
Material plays a crucial role in heat distribution and durability. Stainless steel kettles are popular due to their durability and ease of cleaning. They resist rust and maintain heat well. If you’re looking for something more budget-friendly, aluminum kettles can work, but they require more care to avoid oxidation.
Fermenter
After boiling, your wort needs a place to ferment. This is where fermenters come into play.
Types of Fermenters
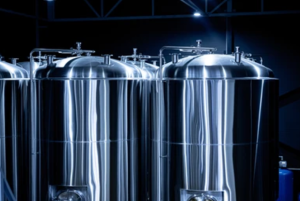
Fermenters come in various shapes and sizes. Conical fermenters are a favorite among homebrewers. They allow for easy yeast removal and are perfect for advanced brewing styles like hop-forward IPAs. If you’re on a budget, plastic buckets or glass carboys can also do the job, though they might not offer the same level of control.
Fermentation Locks and Airlocks
Fermentation locks and airlocks are small but mighty tools. They let carbon dioxide escape while keeping contaminants out. Make sure to have a few on hand to ensure your brew stays safe during fermentation.
Other Key Equipment
Beyond the basics, a few other pieces of equipment can enhance your brewing experience.
Wort Chiller
A wort chiller rapidly cools your wort after boiling. This step is crucial to prevent bacterial contamination and to achieve the desired clarity in your beer. Immersion chillers are easy to use and effective for most homebrew setups.
Hydrometer and Thermometer
Precision is key in brewing. A hydrometer measures the specific gravity of your wort, helping you track fermentation progress and calculate alcohol content. A reliable thermometer ensures you maintain the right temperatures during mashing and fermentation.
Bottling Equipment
Once your beer is ready, you’ll need bottling equipment. A bottling bucket, siphon, and bottle caps are essential. Consider investing in a bottle tree or drying rack to streamline the cleaning and drying process.
With these essential pieces of brewing equipment, you’re well on your way to creating delicious homebrew. Remember, investing in quality tools can make your brewing journey smoother and more enjoyable.
Understanding Ingredients
When it comes to brewing, the ingredients you choose play a pivotal role in shaping the flavor and quality of your beer. Let’s explore the key components that make up your brew.
Malt
Malt forms the backbone of your beer, providing the sugars needed for fermentation.
Types of Malt
You have a variety of malts to choose from, each offering unique characteristics. Base malts like pale malt provide the essential sugars for fermentation. Specialty malts, such as caramel or chocolate malt, add color and distinct flavors. Dark malts, for instance, contribute to the Maillard reaction, creating rich, roasted aromas in your beer.
How Malt Affects Flavor
Malt influences not just the color but also the taste of your beer. It can impart sweetness, nuttiness, or even a hint of chocolate. The choice of malt affects the beer’s body and mouthfeel, making it crucial to select the right type for your desired flavor profile.
Hops
Hops are the spice of beer, adding bitterness and aroma.
Varieties of Hops
There are countless hop varieties, each with its own flavor profile. Some hops offer citrusy notes, while others provide earthy or floral aromas. Choosing the right hops can enhance the complexity of your beer.
Timing and Usage
When you add hops during the brewing process matters. Adding hops early in the boil increases bitterness, while late additions enhance aroma. Experimenting with hop timing allows you to craft a beer that suits your taste preferences.
Yeast
Yeast is the unsung hero of brewing, transforming sugars into alcohol and carbon dioxide.
Selecting the Right Yeast
Choosing the right yeast strain is vital. Different strains produce varying flavors and aromas. Some yeasts create fruity esters, while others offer spicy phenols. Your choice of yeast can significantly influence the final taste of your beer.
Yeast Storage and Activation
Proper yeast storage ensures viability. Keep yeast refrigerated until use. Before brewing, activate the yeast by creating a starter. This step ensures a healthy fermentation, leading to a better-quality beer.
Understanding these ingredients and their roles in homebrewing empowers you to craft beers that reflect your personal taste. Dive into the world of malt, hops, and yeast, and let your creativity flow in your homebrew station.
Water
Water is the unsung hero of brewing. It makes up the majority of your beer, so its quality and chemistry can significantly impact the final product. Let’s dive into how you can ensure your water is just right for brewing.
Water Quality and Treatment
You might not think much about the water you use every day, but when it comes to brewing, quality matters. Good brewing water should be clean and free from contaminants. Here’s how you can ensure your water is up to the task:
Check for Chlorine and Chloramine: These chemicals are often added to municipal water supplies to kill bacteria. However, they can leave off-flavors in your beer. You can remove them by using a carbon filter or by boiling the water before use.
Test for Hardness and pH: Water hardness and pH levels can affect the taste and clarity of your beer. You can use a water testing kit to check these levels. Ideally, your brewing water should have a neutral pH and moderate hardness.
Consider Using Bottled or Distilled Water: If your tap water isn’t up to par, you might want to use bottled or distilled water. This can give you a clean slate to work with, allowing you to add minerals as needed.
Adjusting Water Chemistry
Once you’ve ensured your water is clean, you can take it a step further by adjusting its chemistry to suit the style of beer you’re brewing. Here’s how:
Add Minerals for Flavor: Different minerals can enhance different flavors in your beer. For example, calcium can help with yeast health and clarity, while magnesium can enhance bitterness. You can add these minerals using brewing salts.
Balance Sulfates and Chlorides: The ratio of sulfates to chlorides in your water can affect the beer’s flavor profile. A higher sulfate level can accentuate hop bitterness, while more chlorides can enhance malt sweetness. Adjusting this balance can help you achieve the desired taste.
Use Acid to Adjust pH: If your water’s pH is too high, you can lower it by adding a small amount of acid, such as lactic acid. This can help improve the mash efficiency and the overall flavor of your beer.
By paying attention to water quality and chemistry, you can take your homebrew to the next level. Remember, great beer starts with great water. So, don’t overlook this crucial ingredient in your brewing process.
Step-by-Step Brewing Process
Embarking on your homebrewing journey involves understanding each step of the brewing process. Let’s break it down into manageable parts to ensure you craft the best brew possible.
Sanitizing
Importance of Cleanliness
Cleanliness is crucial in homebrewing. You want to ensure that no unwanted bacteria or wild yeast spoil your brew. Contaminants can lead to off-flavors and ruin your hard work. Always clean and sanitize all equipment before and after use. This practice keeps your brewing environment safe and your beer tasting great.
Effective Sanitizing Techniques
To effectively clean and sanitize, start by washing your equipment with warm water and a mild detergent. Rinse thoroughly to remove any soap residue. Next, use a no-rinse sanitizer, which is available at most brewing supply stores. Follow the instructions on the sanitizer for the best results. Remember, a clean and sanitize routine is your first defense against contamination.
Mashing
Mashing Basics
Mashing is where you convert starches from malt into fermentable sugars. You’ll mix crushed malt with hot water, creating a mash. This process activates enzymes that break down the starches. Aim for a mash temperature between 148°F and 158°F. This range ensures optimal enzyme activity for sugar conversion.
Temperature Control
Maintaining the right temperature during mashing is vital. Use a reliable thermometer to monitor the mash. If the temperature drops, add hot water to bring it back up. Conversely, if it gets too hot, stir the mash to cool it down. Consistent temperature control leads to better sugar extraction and a more balanced beer.
Boiling
Boil Duration and Additions
Boiling your wort serves several purposes. It sterilizes the liquid, extracts flavors from hops, and evaporates unwanted compounds. A typical boil lasts 60 to 90 minutes. During this time, you’ll add hops at different intervals. Early additions contribute bitterness, while later ones enhance aroma.
Managing Boil Over
Boil overs can be messy and wasteful. To prevent them, keep a close eye on your kettle as it reaches a boil. Reduce the heat if the foam rises too quickly. Stirring the wort can also help manage the foam. A spray bottle with cold water can quickly knock down a rising foam, keeping your brewing process smooth.
By following these steps, you ensure a successful brewing process. Each stage plays a critical role in crafting a delicious homebrew. With practice, you’ll refine your techniques and create beers that reflect your unique taste.
Fermenting
Fermentation is where the magic happens in the brewing process. This stage transforms your wort into beer, thanks to the hardworking yeast. Let’s explore the nuances of fermentation to ensure your brew turns out just right.
Primary vs. Secondary Fermentation
In homebrewing, you often hear about primary and secondary fermentation. But what’s the difference?
Primary Fermentation: This is the initial stage where yeast consumes the sugars in your wort, producing alcohol and carbon dioxide. It usually lasts about one to two weeks. During this time, you’ll notice bubbling in the airlock, indicating active fermentation. Keep your fermenter in a cool, dark place to maintain a stable temperature.
Secondary Fermentation: Not always necessary, but it can enhance clarity and flavor. After primary fermentation, you transfer the beer to another vessel, leaving sediment behind. This stage can last a few weeks and allows flavors to mature. It’s especially useful for beers with added flavors or higher alcohol content.
Monitoring Fermentation Progress
Keeping an eye on fermentation progress ensures your beer develops as expected. Here’s how you can do it:
- Visual Cues: Look for bubbling in the airlock and foam on top of the beer. These signs indicate active fermentation.
- Gravity Readings: Use a hydrometer to measure specific gravity. Take readings at the start and end of fermentation to track progress and calculate alcohol content.
- Taste Tests: Sample your beer periodically. This helps you understand flavor development and decide when to move to the next stage.
Packaging
Once fermentation is complete, it’s time to package your beer. This step involves choosing between bottling and kegging, and mastering carbonation techniques.
Bottling vs. Kegging
Deciding whether to bottle or keg your beer depends on your preferences and setup.
Bottling: A traditional method that requires bottles, caps, and a capper. It’s cost-effective and allows for easy sharing. However, it involves more cleaning and can take longer to carbonate.
Kegging: Offers convenience and quicker carbonation. You’ll need a keg, CO2 tank, and kegerator. Kegging provides consistent carbonation and reduces oxidation risk. It’s ideal if you have the space and budget for the equipment.
Carbonation Techniques
Carbonation adds the final touch to your beer, enhancing its mouthfeel and aroma. Here are some techniques:
Priming Sugar: For bottling, add a measured amount of sugar before sealing. Yeast consumes the sugar, producing CO2 and carbonating the beer naturally.
Force Carbonation: Common in kegging, this method involves injecting CO2 directly into the keg. Adjust the pressure to achieve desired carbonation levels quickly.
By mastering fermentation and packaging, you ensure your homebrew is flavorful and well-carbonated. Each step in the brewing process contributes to the final product, so take your time and enjoy the journey.
Advanced Brewing Techniques
Exploring advanced brewing techniques can elevate your homebrewing experience, allowing you to craft unique and complex flavors. Let’s dive into some methods that can take your beer to the next level.
Dry Hopping
Dry hopping is a technique that enhances the aroma of your beer without adding bitterness. You add hops to the fermenter after the primary fermentation has completed. This method allows the hops’ essential oils to infuse into the beer, creating vibrant aromas.
Choose Your Hops: Select hop varieties known for their aromatic qualities, such as Citra or Mosaic. These hops can impart citrusy, floral, or fruity notes to your beer.
Timing is Key: Add hops during the secondary fermentation stage. Let them steep for about 3 to 7 days. This duration allows the beer to absorb the hop oils without developing grassy flavors.
Experiment with Quantities: Start with a small amount and adjust based on your taste preferences. More hops will intensify the aroma, but too much can overwhelm the beer’s balance.
Barrel Aging
Barrel aging introduces complex flavors and aromas to your beer by allowing it to mature in wooden barrels. This technique can add notes of vanilla, oak, and even whiskey, depending on the barrel used.
Select the Right Barrel: Choose barrels that complement your beer style. For instance, bourbon barrels work well with stouts, while wine barrels can enhance sour ales.
Monitor the Aging Process: Aging times vary based on the beer and barrel type. Regularly taste your beer to ensure it develops the desired flavors without becoming overly woody.
Consider Blending: After aging, blend the barrel-aged beer with fresh beer to achieve a balanced flavor profile. This step can help mellow intense flavors and create a harmonious final product.
Experimenting with Flavors
Experimenting with flavors allows you to personalize your beer and create something truly unique. You can add fruits, spices, or even herbs to your brew.
Start with Small Batches: Test new flavors in small batches to avoid wasting ingredients if the experiment doesn’t turn out as expected.
Balance is Crucial: Ensure that added flavors complement the base beer rather than overpowering it. Taste frequently during the brewing process to maintain balance.
Document Your Process: Keep detailed notes on the ingredients and quantities used. This documentation helps replicate successful experiments and refine future brews.
By incorporating these advanced brewing techniques, you can expand your homebrewing repertoire and create beers that stand out. Each method offers a unique way to enhance your beer’s flavor and aroma, making your brewing journey even more exciting.
Common Issues and Solutions
Even the most experienced homebrewers encounter challenges. Understanding common issues and their solutions can help you brew better beer. Let’s tackle some typical problems you might face.
Off-Flavors
Off-flavors can ruin your beer’s taste. Identifying and fixing them is crucial.
Diacetyl (Buttery Flavor): This flavor often results from incomplete fermentation. Ensure your yeast completes its job by maintaining proper fermentation temperatures. Allow your beer to rest for a few days after fermentation to let the yeast clean up any diacetyl.
Acetaldehyde (Green Apple Taste): This occurs when fermentation is rushed. Give your beer enough time to ferment fully. Use a hydrometer to check if fermentation has finished before bottling.
Oxidation (Stale or Cardboard Taste): Exposure to oxygen can cause this. Minimize splashing when transferring your beer. Use airtight containers and avoid opening them unnecessarily.
Fermentation Problems
Fermentation is a critical stage. Problems here can affect your beer’s quality.
Stuck Fermentation: Sometimes, fermentation stops prematurely. Check your yeast’s health and ensure it’s active. Rehydrate dry yeast properly before pitching. If fermentation stalls, gently swirl the fermenter to rouse the yeast.
Overactive Fermentation: This can lead to blow-offs. Use a larger fermenter or a blow-off tube to handle excess foam. Keep an eye on temperature, as high temperatures can cause vigorous fermentation.
Temperature Fluctuations: Yeast prefers stable temperatures. Use a fermentation chamber or a temperature-controlled area to maintain consistency. This helps yeast work efficiently and prevents off-flavors.
Bottling Mishaps
Bottling can be tricky. Avoid these common pitfalls for a smooth process.
Under-Carbonation: If your beer lacks fizz, it might be due to insufficient priming sugar. Measure sugar accurately and mix it well with the beer before bottling. Store bottles at room temperature for carbonation to occur.
Over-Carbonation: Too much priming sugar can cause this. It leads to gushing or exploding bottles. Double-check your measurements and use a priming calculator if needed.
Leaky Caps: Ensure caps are sealed tightly. Use a reliable capper and inspect each bottle for a secure fit. Leaks can lead to flat beer and contamination.
By addressing these common issues, you can improve your brewing skills and enjoy better beer. Remember, practice makes perfect. Each batch teaches you something new, so keep experimenting and refining your techniques.
Tips for Successful Homebrewing
Embarking on your homebrewing journey can be both exciting and rewarding. To ensure success, consider these valuable tips that will enhance your brewing experience and help you craft exceptional beer.
Record Keeping
Keeping detailed records of your brewing process is crucial. Document every step, from the ingredients used to the fermentation temperatures. This practice allows you to replicate successful batches and learn from any mistakes. Use a brewing journal or digital app to track your recipes, observations, and results. Over time, you’ll build a valuable resource that guides your brewing decisions and helps you refine your techniques.
Experimentation and Creativity
Homebrewing offers endless opportunities for creativity. Don’t hesitate to experiment with different ingredients and techniques. Try adding unique flavors like fruits, spices, or herbs to your brew. Adjust hop varieties or malt types to discover new taste profiles. Remember, brewing is both a science and an art. Embrace your creativity and let it guide you in crafting beers that reflect your personal style and preferences.
Joining a Homebrew Community
Connecting with other homebrewers can significantly enhance your brewing journey. Join local clubs or online forums to share experiences, exchange tips, and seek advice. Engaging with a community provides support and inspiration, helping you overcome challenges and celebrate successes. You’ll also gain access to a wealth of knowledge from experienced brewers who can offer insights into advanced techniques and troubleshooting common issues.
By following these homebrewing tips, you’ll set yourself up for success and enjoy the process of creating delicious beer. Keep experimenting, learning, and connecting with fellow brewers to continually improve your skills and expand your brewing repertoire.
Promoting COFF’s Brewer Supplies
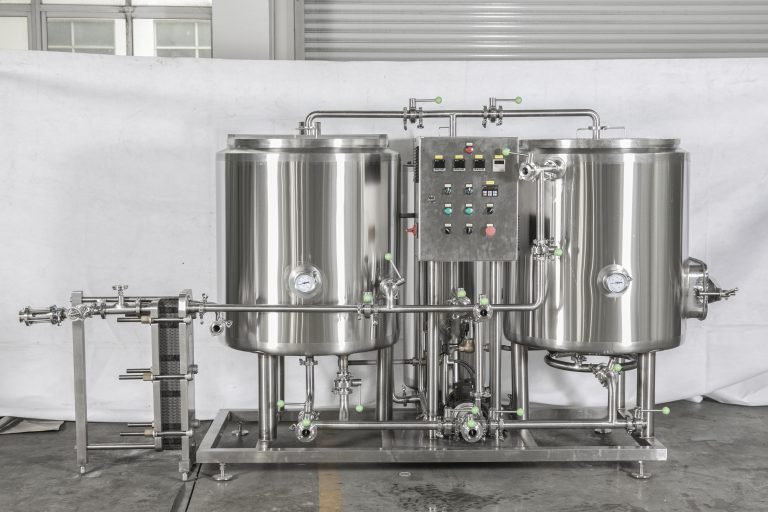
When it comes to setting up your homebrew station, choosing the right supplier for your brewing equipment and ingredients is crucial. COFF’s Brewer Supplies stands out as a top choice for homebrewers looking to elevate their brewing experience. Let’s explore why COFF should be your go-to supplier.
Why Choose COFF
Quality Craftsmanship: COFF prides itself on producing high-quality brewing equipment. Each piece is crafted with precision, ensuring durability and reliability. Whether you’re just starting or you’re a seasoned brewer, COFF’s equipment will meet your needs.
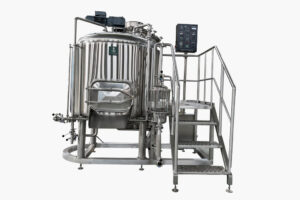
Innovative Designs: COFF is known for its innovative approach to brewing equipment. They offer unique features like oil-heated brewhouses, which provide consistent heat distribution. This innovation helps you achieve better control over your brewing process.
Customer-Centric Approach: At COFF, customer satisfaction is a priority. They focus on understanding your needs and providing solutions that enhance your brewing journey. Their team is always ready to assist you with any questions or concerns.
Global Reputation: COFF has earned a strong reputation worldwide. Many homebrewers trust COFF for their brewing supplies, thanks to their commitment to quality and service. Join the community of satisfied brewers who rely on COFF for their homebrewing needs.
COFF’s Product Range
COFF offers a comprehensive range of products to suit every aspect of your brewing process:
Brew Kettles: Available in various sizes and materials, COFF’s brew kettles are designed for efficiency and ease of use. Choose from stainless steel options for durability and easy cleaning.
Fermenters: COFF provides a selection of fermenters, including conical fermenters for advanced brewing techniques. These fermenters allow for easy yeast removal and precise fermentation control.
Wort Chillers: Rapidly cool your wort with COFF’s efficient wort chillers. These chillers help prevent bacterial contamination and improve the clarity of your beer.
Bottling Equipment: From bottling buckets to caps, COFF has everything you need to package your beer. Their equipment ensures a smooth bottling process, so you can enjoy your brew without hassle.
Tap Towers and Beer Line Tubing: Enhance your serving setup with COFF’s tap towers and beer line tubing. These products ensure a professional presentation and maintain the quality of your beer from keg to glass.
Customer Testimonials
Don’t just take our word for it—here’s what some of our satisfied customers have to say about COFF’s Brewer Supplies:
“I’ve been using COFF’s equipment for years, and I couldn’t be happier. The quality is unmatched, and their customer service is top-notch.” — Alex, Homebrewer
“COFF’s innovative designs have transformed my brewing process. The oil-heated brewhouse is a game-changer!” — Jamie, Craft Brewer
“I love the variety of products COFF offers. Their fermenters and tap towers have made my homebrew station complete.” — Sam, Beer Enthusiast
Choosing COFF’s Brewer Supplies means investing in quality, innovation, and exceptional customer service. Elevate your homebrewing experience with COFF and join the community of brewers who trust their products.
Kegerator Setup
Setting up a kegerator can transform your homebrew station into a professional-grade beer-serving hub. It keeps your beer fresh and perfectly carbonated, ready to pour at any moment. Let’s walk through the essentials of kegerator setup to ensure you get the most out of your homebrew experience.
Choosing the Right Kegerator
Selecting the right kegerator is crucial for your brewing needs. Consider the following factors:
Size and Capacity: Determine how many kegs you plan to store. A standard kegerator can hold one full-size keg, but if you want to serve multiple brews, look for models that accommodate smaller kegs or have dual taps.
Temperature Control: Look for a kegerator with precise temperature control. This feature ensures your beer stays at the ideal serving temperature, preserving its flavor and carbonation.
Energy Efficiency: Choose a model with energy-efficient features. This not only saves on electricity bills but also reduces your environmental footprint.
Design and Aesthetics: Consider the design that fits your space and style. Stainless steel models offer a sleek, modern look, while wooden finishes can add a rustic touch.
Installation Tips
Installing your kegerator correctly ensures optimal performance. Here are some tips to guide you:
Location: Place your kegerator in a cool, dry area with good ventilation. Avoid direct sunlight or heat sources, which can affect temperature regulation.
Level Surface: Ensure the kegerator sits on a level surface. This prevents uneven pressure on the kegs and ensures smooth beer flow.
Proper Sealing: Check all seals and gaskets to prevent air leaks. A tight seal maintains the internal temperature and keeps your beer fresh.
CO2 Setup: Install the CO2 tank securely and adjust the regulator to the desired pressure. This step is vital for maintaining the right carbonation level in your beer.
Maintenance and Care
Regular maintenance keeps your kegerator running smoothly and extends its lifespan. Follow these care tips:
Clean Regularly: Clean the beer lines and taps after each keg to prevent buildup and contamination. Use a cleaning kit designed for kegerators for best results.
Check CO2 Levels: Monitor the CO2 tank and refill it as needed. Low CO2 levels can lead to flat beer.
Inspect Components: Regularly inspect hoses, seals, and connections for wear and tear. Replace any damaged parts promptly to avoid leaks or malfunctions.
Defrost: If your kegerator has a freezer compartment, defrost it periodically to maintain efficiency.
By following these guidelines, your kegerator setup will enhance your homebrewing experience, providing you with perfectly chilled and carbonated beer at your fingertips. Enjoy the convenience and satisfaction of serving your brew like a pro!
Brewing Beer at Home
Brewing beer at home is a rewarding hobby that lets you craft unique flavors and enjoy the fruits of your labor. Setting up a dedicated space and choosing the right equipment can enhance your brewing experience. Let’s explore how you can create an ideal homebrew station.
Creating a Dedicated Brew Space
A dedicated brew space makes brewing more organized and enjoyable. Here’s how you can set it up:
- Location: Choose a spot with good ventilation and easy access to water. A garage or basement often works well.
- Organization: Keep your equipment and ingredients neatly arranged. Shelving units or pegboards can help you store items efficiently.
- Safety: Ensure your space is safe. Keep electrical cords away from water and have a fire extinguisher nearby.
Creating a dedicated brew space not only streamlines your process but also makes brewing beer at home more enjoyable.
Budget-Friendly Setup Options
You don’t need to break the bank to start homebrewing. Here are some budget-friendly tips:
- Start Small: Begin with basic equipment like a brew kettle, fermenter, and bottling gear. You can upgrade as you gain experience.
- DIY Solutions: Consider building your own equipment, like a mash tun or wort chiller, using affordable materials.
- Second-Hand Gear: Look for used equipment online or at local homebrew clubs. You can often find quality items at a fraction of the cost.
By focusing on essential tools and creative solutions, you can enjoy brewing beer at home without overspending.
Enhancing the Brewing Experience
Enhancing your brewing experience involves more than just equipment. Here are some ways to elevate your homebrewing:
- Experiment with Recipes: Try different ingredients and techniques. This experimentation can lead to exciting new flavors.
- Join a Community: Connect with other homebrewers. Sharing tips and experiences can inspire you and improve your skills.
- Invest in Quality: As you progress, consider investing in high-quality equipment from trusted brands like COFF. Their innovative designs and durable products can make a significant difference in your brewing process.
By focusing on creativity and community, you can enhance your homebrewing journey and create beers that truly reflect your taste.
Setup Guide for Homebrewing
Creating an efficient and enjoyable homebrewing setup involves careful planning and organization. This guide will help you design a space that enhances your brewing experience, ensuring safety and cleanliness.
Layout Considerations
When setting up your homebrew station, think about the flow of your brewing process. A well-organized layout can make brewing more efficient and enjoyable.
Space Allocation: Dedicate specific areas for different stages of brewing, such as mashing, boiling, and fermenting. This separation helps keep your process organized and reduces the risk of cross-contamination.
Accessibility: Arrange your equipment so that everything you need is within easy reach. Keep frequently used items like brew kettles and fermenters close at hand to streamline your workflow.
Storage Solutions: Use shelves or cabinets to store ingredients and tools. Label containers for easy identification. This organization saves time and prevents mix-ups during brewing.
Ventilation and Safety
Proper ventilation and safety measures are crucial in a homebrew setup. They ensure a safe environment and prevent potential hazards.
Ventilation: Brewing generates heat and steam, which can build up in enclosed spaces. Install a fan or open windows to improve airflow. This ventilation helps dissipate heat and prevents condensation, which can lead to mold growth.
Safety Precautions: Keep a fire extinguisher nearby in case of emergencies. Ensure electrical outlets are away from water sources to prevent accidents. Use non-slip mats to reduce the risk of falls.
CO2 Management: If you’re using a kegerator, follow the setup guide to properly install the CO2 element. Secure the CO2 tank and adjust the regulator to maintain safe pressure levels.
Cleaning and Sanitation Station
Maintaining cleanliness is vital in brewing. A dedicated cleaning and sanitation station ensures your equipment stays in top condition.
Cleaning Supplies: Stock up on essential cleaning agents like mild detergents and no-rinse sanitizers. These products help keep your equipment free from contaminants.
Utility Sink: Install a large sink or utility tub for washing equipment. This setup makes cleaning more convenient and efficient, allowing you to rinse and sanitize items quickly.
Drying Rack: Use a bottle tree or drying rack to air-dry sanitized equipment. This step prevents water spots and ensures your tools are ready for the next brewing session.
By following this setup guide, you’ll create a homebrewing station that’s efficient, safe, and clean. A well-organized space enhances your brewing experience, allowing you to focus on crafting delicious beer.
You’ve now got the essential steps and equipment to set up your homebrew station. From choosing the right brew kettle to mastering fermentation, each piece of equipment plays a vital role in crafting your perfect pint. Remember, brewing is a journey. Embrace creativity and experiment with flavors. Start your brewing adventure with confidence. As Matt from Brew Cabin says, “Homebrewing is about making it approachable and scalable.” So, dive in and enjoy the process. With COFF’s quality supplies, you’re well-equipped to create something truly special. Cheers to your brewing success!
FAQ
What is the most important equipment for homebrewing?
The brew kettle stands out as the most crucial piece of equipment. It serves as the heart of your brewing process. You boil your wort here, which is essential for extracting flavors and sterilizing the mixture. Choosing the right size and material, like stainless steel, ensures durability and efficiency.
How do I ensure my brewing equipment stays clean?
Proper cleaning and sanitization are vital. First, wash your equipment with warm water and mild detergent. Rinse thoroughly. Then, use a no-rinse sanitizer to eliminate any microorganisms. This step prevents contamination and maintains the quality of your beer.
Why is rapid chilling of wort important?
Rapid chilling reduces the risk of wild bacteria forming in your wort. As soon as you finish boiling, use a wort chiller to cool it quickly. This step, combined with strict sanitization, helps prevent contamination and ensures a clear, flavorful beer.
How do I choose the right yeast for my brew?
Selecting the right yeast depends on the beer style you want to create. Different yeast strains produce varying flavors and aromas. For instance, ale yeasts often create fruity esters, while lager yeasts offer cleaner profiles. Consider your desired flavor profile when choosing yeast.
What role does water play in brewing?
Water makes up the majority of your beer, so its quality significantly impacts the final product. Ensure your water is free from chlorine and has the right mineral balance. Adjusting water chemistry can enhance flavors, making it a crucial ingredient in brewing.
How can I avoid off-flavors in my beer?
Off-flavors often result from poor fermentation or contamination. Maintain proper fermentation temperatures and ensure your yeast completes its job. Use airtight containers to minimize oxidation. Regularly clean and sanitize all equipment to prevent unwanted flavors.
Is it better to bottle or keg my beer?
Both methods have their benefits. Bottling is cost-effective and allows for easy sharing. Kegging offers convenience and quicker carbonation. Consider your space, budget, and preference for serving when deciding between the two.
How can COFF’s Brewer Supplies enhance my brewing experience?
COFF offers high-quality brewing equipment designed for efficiency and durability. Their innovative designs, like oil-heated brewhouses, provide consistent heat distribution. With COFF, you get reliable tools that elevate your brewing process, ensuring you craft exceptional beer every time.

