COPYRIGHT © 2022 NingBo COFF Machinery Co., ltd. ALL RIGHTS RESERVED
Menu
Categories

Imagine the thrill of crafting your own spirits right at home. Home distilling offers you the chance to create unique flavors and enjoy the fruits of your labor. But before you dive in, understanding the setup process is crucial. Safety should always be your top priority. Selecting the professional distilling equipment tailored to your needs can make all the difference. Whether you’re a novice or a seasoned enthusiast, choosing the right equipment ensures a smooth and enjoyable distilling experience. So, are you ready to embark on this exciting journey?
Understanding Your Alcohol Distillery Kit
When you start your journey into home distilling, understanding your alcohol distillery kit is crucial. Each component plays a vital role in the distillation process, ensuring you produce high-quality spirits safely and efficiently. Let’s dive into the key components and additional accessories that make up your kit.
Key Components
Boiler
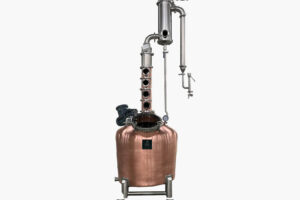
The boiler is the heart of your alcohol distillation equipment. It heats the mash, turning it into vapor. You need to choose a boiler that suits your batch size. A larger boiler allows for bigger batches, while a smaller one is perfect for experimenting with different recipes.
Condenser
The condenser cools the vapor back into liquid form. This component is essential for capturing the alcohol. Many alcohol distiller kits feature condensers with copper coils. Copper is excellent for thermal conductivity, ensuring efficient cooling and a smoother final product.
Thermometer
A thermometer helps you monitor the temperature during distillation. Keeping an eye on the temperature ensures that you maintain the right conditions for alcohol production. Accurate temperature control is key to achieving the desired flavor and quality.
Fermentation Lock
The fermentation lock allows gases to escape during fermentation while preventing contaminants from entering. This small but crucial component ensures that your mash ferments properly, setting the stage for successful distillation.
Additional Accessories
Hydrometer
A hydrometer measures the specific gravity of your mash. This tool helps you determine the alcohol content and track the fermentation progress. It’s an invaluable accessory for anyone serious about home distilling.
Alcoholmeter
An alcoholmeter measures the alcohol content of your distilled spirits. After distillation, you can use this tool to ensure your spirits meet your desired strength. It’s a must-have for achieving consistency in your homemade beverages.
Cleaning Supplies
Keeping your alcohol distillation equipment clean is essential for producing high-quality spirits. Regular cleaning prevents contamination and ensures the longevity of your kit. Invest in good cleaning supplies to maintain your equipment in top condition.
Understanding these components and accessories will set you on the path to successful home distilling. With the right complete alcohol distiller kit, you can enjoy the art of crafting your own spirits with confidence.
Step-by-Step Setup Process

Setting up your alcohol distillery kit can feel like a daunting task, but breaking it down into manageable steps makes it much easier. Let’s walk through the process together, ensuring you have a safe and efficient setup for distilling alcohol at home.
Preparing Your Workspace
Before you start assembling your home still kits, it’s crucial to prepare your workspace. This step ensures that you have a safe and organized area to work in.
Choosing a Safe Location
First, find a suitable location for your distillation activities. You want a space that’s stable and away from any flammable materials. A garage or a well-ventilated basement often works well. Make sure the surface is level to prevent any accidents during the distillation process.
Ensuring Proper Ventilation
Proper ventilation is key when distilling alcohol at home. You need to ensure that any fumes produced during the process can escape easily. Open windows or use fans to maintain good airflow. This step not only keeps you safe but also helps in maintaining the quality of your spirits.
Assembling the Kit
Once your workspace is ready, it’s time to assemble your kit. This part involves connecting the various components of your home still kits.
Connecting the Boiler and Condenser
Start by connecting the boiler to the condenser. This connection is vital as it allows the vapor to travel from the boiler to the condenser, where it cools and turns back into liquid. Ensure all connections are tight to prevent any leaks.
Installing the Thermometer
Next, install the thermometer. Place it in a position where you can easily monitor the temperature. Keeping an eye on the temperature helps you control the distillation process, ensuring you produce high-quality spirits.
Initial Cleaning and Testing
Before you begin distilling alcohol at home, it’s essential to clean and test your equipment. This step ensures everything is in working order and free from contaminants.
Cleaning the Equipment
Thoroughly clean all parts of your distillery kit. Use appropriate cleaning supplies to remove any residues or impurities. Clean equipment is crucial for producing safe and tasty spirits.
Conducting a Test Run
Finally, conduct a test run with water. This practice run helps you check for leaks and ensures that all components are functioning correctly. It’s a great way to familiarize yourself with the setup before you start distilling alcohol at home.
By following these steps, you set yourself up for a successful and enjoyable distillation experience. Remember, preparation and attention to detail are key to crafting your own spirits safely and effectively.
Safety Considerations
When setting up your alcohol distillery kit, safety should be your top priority. Handling equipment safely and monitoring the distillation process are crucial steps to ensure a safe and successful experience.
Handling Equipment Safely
To protect yourself and your surroundings, you need to handle your distillation equipment with care. Here are some essential tips:
Wearing Protective Gear
Always wear protective gear when working with your distillery kit. This includes safety goggles, gloves, and an apron. These items protect you from potential spills or splashes. Remember, ethanol vapors can be hazardous, so taking precautions is vital.
Avoiding Open Flames
Avoid open flames near your distillation setup. Ethanol vapors are highly flammable and pose a significant fire risk. Ensure your workspace is free from any ignition sources. Use electric heating elements instead of gas burners to minimize the risk of fire.
Monitoring the Distillation Process
Keeping a close eye on the distillation process helps you maintain control and ensures the quality of your spirits. Here’s how you can do it effectively:
Checking Temperature Regularly
Regularly check the temperature during distillation. Temperature control is crucial for achieving the desired alcohol content and quality. Use a reliable thermometer to monitor the temperature and make adjustments as needed. Consistent temperature management leads to better results.
Ensuring Proper Sealing
Ensure all connections in your distillation setup are properly sealed. Leaks can lead to vapor loss and potential hazards. Tighten all fittings and check for any signs of leakage. Proper sealing not only enhances safety but also improves the efficiency of your distillation process.
By following these safety considerations, you create a secure environment for your home distilling activities. Prioritizing safety allows you to enjoy the art of crafting your own spirits with peace of mind.
Selecting the Right Alcohol Distillery Kit
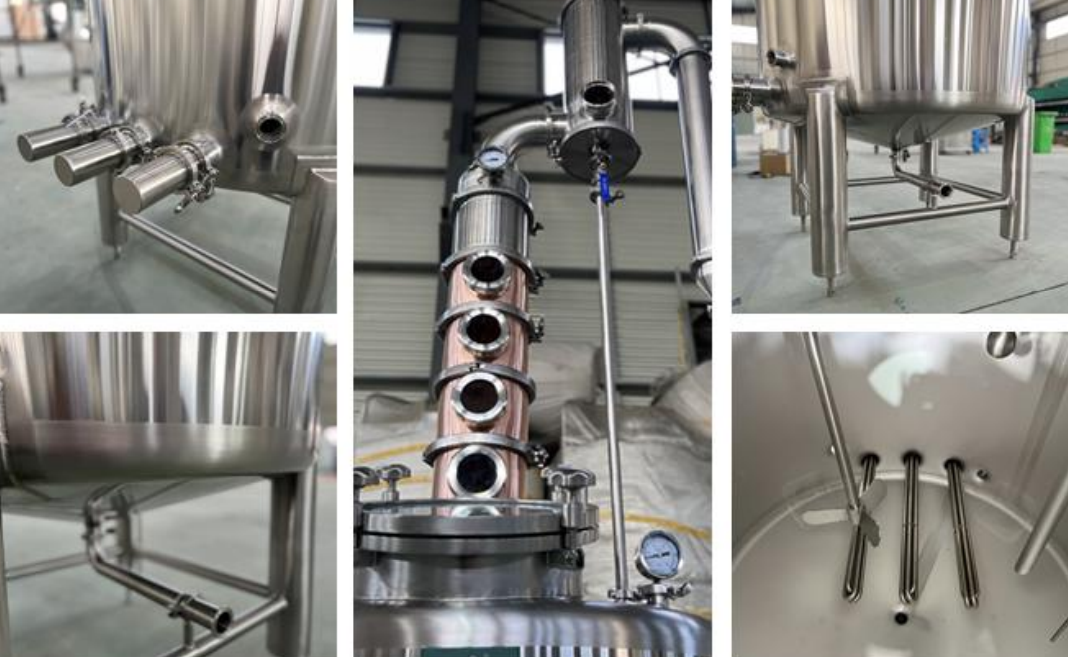
Choosing the right alcohol distillery kit is crucial for your home distilling journey. You want a kit that matches your needs and ensures a smooth process. Let’s explore how to select the best home distilling kit for you.
Determining Capacity Needs
When selecting a kit, consider how much spirit you plan to produce. This decision impacts the size of the kit you need.
Small Batch vs. Large Batch
If you’re just starting or prefer experimenting with different recipes, a small batch kit might be your best choice. These kits are easier to manage and require less space. They allow you to try various flavors without committing to large quantities. On the other hand, if you plan to produce spirits in larger volumes, opt for a large batch kit. These kits handle more mash and produce more spirits per run. Consider your goals and available space when deciding between small and large batch kits.
Choosing the Right Material
The material of your distillery kit affects the quality and taste of your spirits. You have two main options: stainless steel and copper.
Stainless Steel vs. Copper
Stainless steel kits are durable and resistant to corrosion. They are easy to clean and maintain, making them a popular choice for many home distillers. Stainless steel doesn’t react with the mash, ensuring a pure flavor. Copper kits, however, offer excellent thermal conductivity. They help remove sulfur compounds, resulting in smoother spirits. Copper also adds a unique character to your spirits. Consider what qualities you value most when choosing between stainless steel and copper kits.
Evaluating Safety Features
Safety should always be a priority when selecting a distillery kit. Look for features that enhance safety during the distillation process.
Pressure Relief Valves
A good kit includes pressure relief valves. These valves prevent pressure buildup, reducing the risk of accidents. They ensure that your distillation process remains safe and controlled. Always check for this feature when evaluating kits.
Secure Connections
Ensure that your kit has secure connections. Tight fittings prevent leaks and vapor loss. They also contribute to the efficiency of the distillation process. Look for kits with robust and reliable connections to ensure a safe and successful distillation experience.
By considering these factors, you can select the best home distilling kit that meets your needs. Whether you prioritize capacity, material, or safety, the right kit will enhance your home distilling journey.
Tips for Beginners
Starting your journey with a home distilling kit can be both exciting and a bit overwhelming. But don’t worry, you’re not alone in this adventure. Many beginners, like Colter Wilson, have found success by understanding the basics and taking a step-by-step approach. Let’s dive into some practical tips to help you get started on the right foot.
Starting with Simple Recipes
When you’re new to home distilling, it’s best to begin with simple recipes. This approach allows you to grasp the fundamentals without getting bogged down by complexity. Here are two classic spirits to start with:
Vodka
Vodka is a great choice for beginners. It’s a neutral spirit, which means you don’t have to worry about intricate flavors right away. To make vodka, you’ll need a basic mash of grains or potatoes. Your home distilling kit will help you convert this mash into a clean, smooth spirit. Focus on maintaining a steady temperature and ensuring your equipment is clean. These steps will help you produce a high-quality vodka.
Gin
Once you’re comfortable with vodka, try your hand at gin. Gin offers a bit more complexity with its botanical infusions. Start with a vodka base and add juniper berries and other botanicals of your choice. Your home distilling kit will allow you to experiment with different flavors. Remember, the key to great gin is balance. Don’t be afraid to tweak your recipe until you find the perfect blend.
Keeping a Distillation Log
Keeping a distillation log is an invaluable practice for anyone using a home distilling kit. It helps you track your progress and learn from each batch. Here’s how to make the most of your log:
Recording Observations
Write down everything you observe during the distillation process. Note the temperature, the time it takes for each stage, and any changes in the aroma or color of the spirit. These details will help you understand how different factors affect the final product. Over time, you’ll develop a keen sense for what works and what doesn’t.
Tracking Improvements
Use your log to track improvements in your distilling skills. Compare your notes from different batches to see how your techniques evolve. Did a slight change in temperature improve the flavor? Did a longer fermentation period result in a smoother spirit? By analyzing your log, you’ll gain insights that will refine your home distilling process.
Embarking on the journey of home distilling is a rewarding experience. By starting with simple recipes and keeping a detailed log, you’ll build a solid foundation for crafting your own spirits. Remember, every batch is a learning opportunity. Enjoy the process, and don’t hesitate to experiment with your home distilling kit. Happy distilling!
Common Mistakes to Avoid
Embarking on the journey of home distilling can be thrilling, but it’s easy to stumble into common pitfalls. By being aware of these mistakes, you can ensure a smoother and more successful experience.
Overfilling the Boiler
One of the most frequent errors beginners make is overfilling the boiler. You might think filling it to the brim will yield more spirits, but this can lead to disastrous results. When the boiler is too full, the mash can foam up and enter the condenser, contaminating your final product. Always leave enough space for the mash to expand as it heats. This precaution not only protects the quality of your spirits but also prevents potential damage to your equipment.
Ignoring Temperature Fluctuations
Temperature control is crucial in the distillation process. You might overlook slight fluctuations, thinking they won’t affect the outcome. However, maintaining a consistent temperature ensures that you extract the desired alcohol content and flavors. Use a reliable thermometer and monitor it closely. If you notice any changes, adjust the heat source promptly. Consistency in temperature leads to a cleaner and more refined spirit.
Skipping the Cleaning Process
After a successful distillation, you might feel tempted to skip cleaning your equipment. However, neglecting this step can lead to contamination and off-flavors in future batches. Residues from previous distillations can affect the taste and safety of your spirits. Make it a habit to thoroughly clean all components of your kit after each use. This practice not only extends the life of your equipment but also ensures that every batch you produce is of the highest quality.
“Should you decide to try this yourself, please know: you will make mistakes. You will have terrible batches of whiskey that go straight down the drain. But once you make that first glass of truly great whiskey, I guarantee the journey will feel worthwhile.”
Remember, every mistake is a learning opportunity. By avoiding these common pitfalls, you set yourself up for a rewarding and enjoyable home distilling experience.
Maintenance and Care
Taking care of your distillation equipment is key to ensuring it performs efficiently and lasts a long time. Regular maintenance not only keeps your equipment in top shape but also ensures the quality of the spirits you produce. Let’s explore how you can maintain and care for your distillation setup effectively.
Regular Cleaning Routine
You should clean your distillation equipment after each use. This practice prevents cross-contamination and keeps your spirits tasting great. Use warm or hot water to wash away dirt, oil residues, and hidden bacteria. Stainless steel, a common material for distillation equipment, is easy to clean and resists corrosion. Make sure to sanitize your equipment before and after use to avoid off-flavors and infections in your wash. A thorough cleaning routine is essential for safe and contamination-free distillation.
Inspecting for Wear and Tear
Regularly inspect your distillation equipment for any signs of wear and tear. Look for cracks, leaks, or any unusual changes in the equipment’s appearance. Manways and access ports are crucial for easy access during cleaning and inspection. These features allow you to check the internal components of your equipment without hassle. By catching issues early, you can prevent bigger problems down the line and ensure your equipment remains in good working order.
Storing Equipment Properly
Proper storage of your distillation equipment is just as important as cleaning and inspecting it. Store your equipment in a dry, cool place to prevent rust and other damage. Disassemble the components if possible, and make sure they are completely dry before storing them. This step helps maintain the integrity of the equipment and ensures it’s ready for use when you need it. Proper storage extends the life of your distillation equipment and keeps it functioning efficiently.
By following these maintenance and care tips, you ensure that your distillation equipment remains effective and reliable. Regular cleaning, thorough inspections, and proper storage are simple steps that make a big difference in the quality of your home distilling experience.
Legal Considerations
When you decide to start distilling alcohol at home, understanding the legal landscape is crucial. Laws vary widely depending on where you live, and knowing these regulations can save you from potential legal troubles.
Understanding Local Laws
Before you even think about setting up your distillery kit, take a moment to familiarize yourself with local laws. Each country, and often each state or region, has its own set of rules regarding home distillation. In many places, producing distilled spirits at home without a permit is illegal. For instance, in the United States, federal law prohibits individuals from making their own hard alcohol at home. However, you can own a still for non-consumable products if you have the correct license.
“Strict codes exist concerning distilled spirits production and consumption, requiring permits/licenses to conform to legal norms.”
To ensure you’re on the right side of the law, contact your local legal authority. They can provide detailed information about the legal situation in your area. This step is essential because even if federal laws are lenient, local regulations might be stricter.
Obtaining Necessary Permits
If you find that home distillation is legal in your area, the next step is obtaining the necessary permits. This process can vary significantly depending on your location. Some regions might require you to apply for a specific distillation permit, while others might include it under a broader category of home brewing licenses.
Research Requirements: Start by researching what permits are needed in your area. Look for information on government websites or contact local authorities directly.
Application Process: Once you know what’s required, begin the application process. This might involve filling out forms, paying fees, and possibly undergoing inspections.
Compliance: After obtaining your permit, ensure you comply with all regulations. This might include regular reporting or adhering to specific safety standards.
Remember, the legality of home distilling equipment often extends to non-alcoholic uses, such as distilling essential oils or cosmetic ingredients. So, even if you can’t legally produce spirits, your equipment might still have other legal applications.
By understanding local laws and obtaining the necessary permits, you can enjoy the art of home distilling without any legal worries. Always prioritize compliance to ensure a safe and enjoyable distilling experience.
FAQ
You’ve got questions about setting up your alcohol distillery kit, and we’ve got answers! Let’s dive into some of the most common queries to help you on your distilling journey.
1. What is the best type of still for beginners?
For beginners, a pot still is often recommended. It’s simple to use and perfect for creating spirits like whiskey and rum. Pot stills allow you to learn the basics of distillation without overwhelming complexity. As you gain experience, you can explore more advanced setups.
2. How do I clean my distilling equipment?
Cleaning your equipment is crucial for producing high-quality spirits. After each use, wash all components with warm water and a mild detergent. Pay special attention to areas where residues might accumulate. Regular cleaning prevents contamination and ensures your spirits taste great every time.
“Cleanliness is key in the world of distiller! If you’re passionate about producing high-quality spirits, it’s important to know how to clean distilling equipment.”
3. Can I use my distillery kit for other purposes?
Yes, you can! Many people use their distillery kits for non-alcoholic purposes, such as distilling essential oils or creating herbal extracts. This versatility makes your kit a valuable tool for various DIY projects.
4. How do I know when to make cuts during distillation?
Making cuts refers to separating different parts of the distillate. The heads, hearts, and tails each have distinct characteristics. Use temperature as a guide, but also rely on your senses. Smell and taste the spirit to determine the transition points. This skill improves with practice and experience.
“Distillers must listen to a spirit coming off the still in order to understand how much time in the barrel it will take for flavors to blossom and come to full beauty.”
5. Is it legal to distill alcohol at home?
The legality of home distillation varies by location. In many places, you need a permit to legally distill alcohol. Always check local laws and regulations before starting. If permits are required, follow the application process to ensure compliance.
“Strict codes exist concerning distilled spirits production and consumption, requiring permits/licenses to conform to legal norms.”
6. What should I do if I encounter a problem during distillation?
If you face issues, don’t panic. First, check all connections and seals for leaks. Ensure the temperature is stable and within the desired range. If problems persist, consult online forums or reach out to experienced distillers for advice. Remember, every challenge is a learning opportunity.
By addressing these common questions, we hope to make your distilling experience smoother and more enjoyable. Keep experimenting, stay safe, and enjoy the art of crafting your own spirits!
Understanding your distillery kit’s components and setup process is crucial for a successful home distilling journey. As you embark on this adventure, prioritize safety and choose the right setup that suits your needs. Remember, distillation involves handling equipment that can be hazardous if not used properly. Always adhere to local laws and regulations when you make moonshine or any other distilled spirits. Enjoy the process, experiment responsibly, and embrace the art of crafting your own spirits. This beginner’s guide for distilled spirits aims to equip you with the knowledge to make moonshine safely and effectively.

