COPYRIGHT © 2022 NingBo COFF Machinery Co., ltd. ALL RIGHTS RESERVED
Menu
Categories
Imagine crafting your own high-quality spirits right at home. With an alcohol distiller machine, you hold the tools to transform simple ingredients into something extraordinary. This process isn’t just rewarding—it’s an art form. However, setting up your kit correctly is crucial. Proper assembly ensures safety and helps you achieve the best results. From securing leak-free connections to using the right materials like stainless steel or copper, every detail matters. By starting with the right setup, you’ll unlock the full potential of your distillation journey while keeping the process safe and efficient.
Key Takeaways
- Understand the key components of your distillery kit, including the boiler, condenser, and thermometer, to ensure efficient and safe operation.
- Choose the right type of distillery kit—pot stills for flavorful spirits and reflux stills for high-purity products—to match your distillation goals.
- Prepare your workspace by selecting a well-ventilated, clutter-free area to ensure safety and efficiency during the distillation process.
- Gather all necessary ingredients and tools before starting, including base ingredients, yeast, and cleaning supplies, to streamline your distillation journey.
- Prioritize safety by following essential precautions, such as working in a ventilated area and keeping a fire extinguisher nearby.
- Regularly clean and inspect your equipment to maintain its longevity and ensure the quality of your spirits.
- Experiment with different ingredients and recipes to create unique flavors, while closely monitoring the distillation process for optimal results.
Understanding Your Alcohol Distillery Kit
Setting up your alcohol distillery kit starts with understanding its components and how they work together. Each part plays a vital role in the distillation process, and knowing their functions will help you operate the kit efficiently and safely.
Key Components and Their Functions
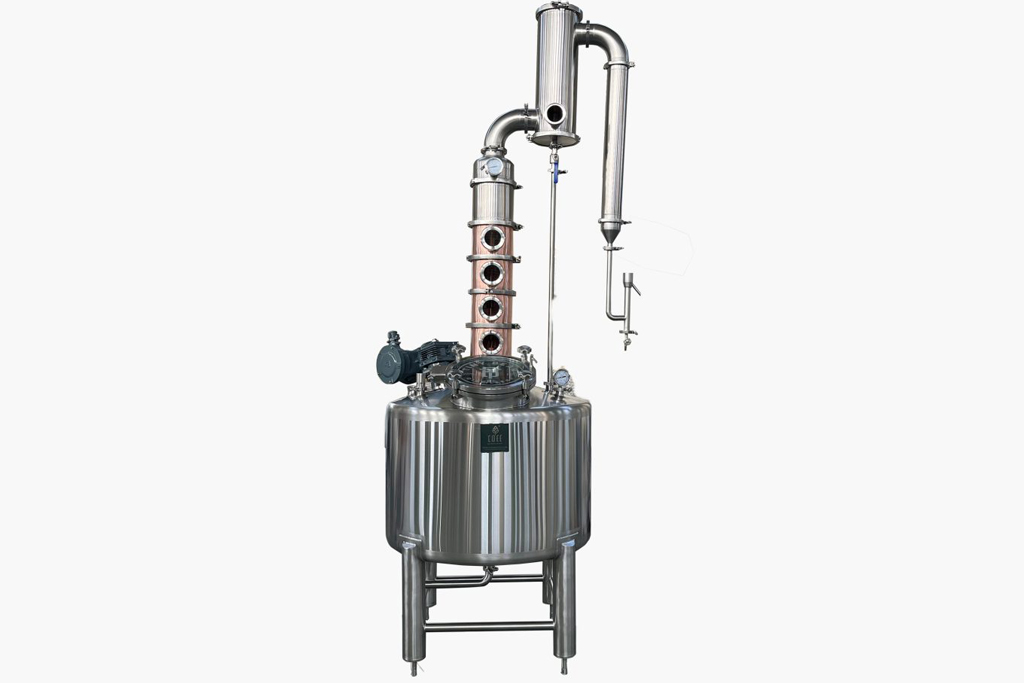
Your alcohol distillery kit typically includes several essential components. Here’s a breakdown of the key parts and what they do:
- Boiler: This is where the magic begins. The boiler heats the mash or wash, turning the liquid into vapor. Stainless steel boilers are common for their durability and resistance to corrosion.
- Condenser: This component cools the vapor back into liquid form. It’s crucial for capturing the distilled alcohol. Many kits use copper condensers because copper removes impurities and enhances flavor.
- Thermometer: Monitoring temperature is critical during distillation. A built-in thermometer helps you maintain the right heat levels for optimal results.
- Collection Container: This is where the final product ends up. Make sure it’s clean and food-safe to preserve the quality of your spirits.
- Connecting Tubes: These tubes transport vapor between the boiler and condenser. Proper assembly ensures a leak-free system.
Each piece works together to create a seamless distillation process. Familiarizing yourself with these components will make setup and operation much smoother.
Types of Distillery Kits: Pot Still vs. Reflux Still
Choosing the right type of distillery kit depends on the kind of spirits you want to produce. The two main types are pot stills and reflux stills, each with unique features and benefits.
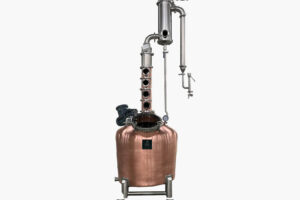
- Pot Still: Ideal for crafting flavorful spirits like whiskey, rum, and brandy. Pot stills are simple to use and focus on preserving the natural flavors of the ingredients. They’re perfect for beginners who want to experiment with traditional recipes.
- Reflux Still: Designed for producing high-purity spirits like vodka and neutral alcohol. Reflux stills use additional columns or plates to refine the distillate, removing impurities and enhancing alcohol concentration. These are great for those aiming for a cleaner, smoother product.
Understanding the differences between these two types will help you select the kit that aligns with your goals and preferences.
Additional Tools and Accessories You May Need
While most alcohol distillery kits come with the basics, a few extra tools can enhance your experience and results. Consider adding these items to your setup:
- Hydrometer: This tool measures the alcohol content of your distillate. It’s essential for ensuring your spirits meet your desired strength.
- Fermentation Vessel: If your kit doesn’t include one, you’ll need a container for fermenting your mash or wash. Look for food-grade plastic or stainless steel options.
- Cleaning Brushes: Keeping your equipment clean is vital for safety and quality. Specialized brushes make it easier to reach tight spaces.
- pH Strips: These help you monitor the acidity of your mash, which can affect fermentation and flavor.
- Heat Source: Some kits don’t include a heat source. An electric or gas burner works well, but ensure it’s compatible with your boiler.
These accessories can simplify the distillation process and improve the quality of your homemade spirits. Investing in the right tools will make your journey more enjoyable and successful.
“For a person who has never had an experience of making distilled alcoholic drinks before, it’s better off starting out with a complete alcohol distiller kit or home still kit.” – This advice highlights the importance of having all the necessary components and guidance when beginning your distillation journey.
By understanding your alcohol distillery kit and its components, you’ll set yourself up for success. Whether you’re crafting whiskey with a pot still or refining vodka with a reflux still, the right knowledge and tools will make all the difference.
Preparing for Setup
Before you dive into the exciting process of distillation, preparation is key. Setting up your alcohol distillery kit properly ensures a smooth and safe experience. Let’s walk through the essential steps to get everything ready.
Choosing the Right Location for Your Distillery Kit
The location you choose for your distillery kit plays a big role in your success. You need a space that is safe, well-ventilated, and free from distractions. Avoid cramped or cluttered areas. Instead, pick a spot where you can move around freely and keep your equipment stable.
Here are some tips for selecting the perfect location:
- Ventilation: Ensure the area has good airflow. Distillation produces vapors, and proper ventilation prevents any buildup of fumes.
- Lighting: A well-lit space helps you monitor the process and avoid accidents. Dim or poorly lit areas can lead to mistakes.
- Flat Surface: Set up your kit on a sturdy, level surface. This keeps your equipment steady and reduces the risk of spills or tipping.
- Distance from Heat Sources: If you’re using a gas burner, keep flammable items far away. Safety should always come first.
By choosing the right location, you’ll create a safe and efficient workspace for your distillation journey.
Gathering Ingredients and Supplies for Distillation
Once you’ve picked the perfect spot, it’s time to gather everything you need. Having all your ingredients and supplies ready saves time and ensures a seamless process.
Here’s a checklist to help you prepare:
- Base Ingredients: Depending on what you’re making, you’ll need grains, sugar, or fruit. For whiskey, go with grains. For vodka, sugar works best.
- Water: Use clean, filtered water for the mash. Impurities in water can affect the flavor of your spirits.
- Yeast: Choose a high-quality yeast designed for alcohol production. It’s essential for fermentation.
- Cleaning Supplies: Stock up on brushes, sanitizers, and cloths. Clean equipment leads to better results.
- Measuring Tools: A hydrometer and thermometer are must-haves. They help you track alcohol content and temperature.
Having these items on hand ensures you’re fully prepared to start distilling. Double-check your supplies before moving forward.
Cleaning and Inspecting Your Equipment Before Use
Clean equipment is the foundation of great spirits. Before you assemble your alcohol distillery kit, take the time to clean and inspect every component. This step prevents contamination and ensures everything works as it should.
Follow these steps to prepare your equipment:
- Wash Thoroughly: Use warm water and a food-safe cleaning solution to scrub each part. Pay extra attention to tight spaces like tubes and connectors.
- Sanitize: After washing, sanitize your equipment to kill any lingering bacteria. This step is crucial for avoiding off-flavors in your spirits.
- Inspect for Damage: Check for cracks, leaks, or worn-out parts. Replace anything that looks damaged to ensure safety during distillation.
- Test Assembly: Put the kit together without ingredients to confirm everything fits properly. Look for leaks or loose connections.
“Failing to clean your equipment can lead to competition between yeast and bacteria, causing infections or off-flavors in your wash.” – This highlights why thorough cleaning is non-negotiable.
By cleaning and inspecting your equipment, you set yourself up for a successful and enjoyable distillation experience.
Step-by-Step Setup Guide for Your Alcohol Distillery Kit
Setting up your alcohol distillery kit might seem overwhelming at first, but breaking it down into simple steps makes the process manageable and enjoyable. Follow this guide to assemble your kit, prepare your mash, and start distilling safely.
Assembling the Distillery Kit Components
The first step is putting your distillery kit together. Each component has a specific role, so assembling them correctly ensures a smooth distillation process. Here’s how you can do it:
- Lay Out All Components: Unpack your kit and place all parts on a clean, flat surface. Double-check that nothing is missing.
- Connect the Boiler and Condenser: Attach the boiler to the condenser using the connecting tubes. Ensure the connections are tight to prevent leaks.
- Install the Thermometer: Insert the thermometer into its designated slot. This tool helps you monitor the temperature during distillation.
- Secure the Collection Container: Position the container where the distilled alcohol will flow. Make sure it’s stable and easy to access.
- Test for Leaks: Before adding any ingredients, run a small amount of water through the system. Check for leaks and tighten any loose connections.
“Starting out with a complete alcohol distiller kit or home still kit is recommended for beginners as they provide step-by-step instructions and everything needed to begin distilling at home safely and effectively.” – This advice highlights the importance of using a well-designed kit for a hassle-free setup.
Taking your time during assembly ensures your equipment works efficiently and safely.
Preparing the Mash for Fermentation
The mash is the foundation of your spirits. Preparing it correctly sets the stage for a successful fermentation process. Follow these steps to create a high-quality mash:
- Choose Your Ingredients: Decide what type of spirit you want to make. For whiskey, use grains like barley or corn. For vodka, opt for sugar or potatoes.
- Mix the Ingredients: Combine your base ingredient with clean, filtered water in a fermentation vessel. Stir until the mixture is uniform.
- Add Yeast: Sprinkle high-quality yeast designed for alcohol production into the mixture. Yeast converts sugars into alcohol during fermentation.
- Monitor the pH Level: Use pH strips to check the acidity of your mash. Aim for a pH level between 5.0 and 5.5 for optimal fermentation.
- Let It Ferment: Cover the vessel and store it in a cool, dark place. Allow the mash to ferment for several days, depending on your recipe.
“Failing to prepare the mash properly can lead to poor fermentation and low-quality spirits.” – This emphasizes why attention to detail during this step is crucial.
By preparing your mash with care, you’ll create a strong foundation for your distillation process.
Starting the Distillation Process Safely and Effectively
Once your mash is ready, it’s time to start distilling. This step requires focus and attention to safety. Here’s how to do it:
- Transfer the Mash: Pour the fermented mash into the boiler. Avoid overfilling to leave room for vapor expansion.
- Heat the Boiler: Turn on your heat source and gradually increase the temperature. Use the thermometer to monitor the heat closely.
- Collect the Distillate: As the mash heats, alcohol vapor will rise and travel through the condenser. The vapor cools and turns back into liquid, which flows into the collection container.
- Separate the Fractions: The distillate comes in three parts: the foreshots, heads, and hearts. Discard the foreshots, as they contain harmful compounds. Collect the heads and hearts separately, focusing on the hearts for the best quality.
- Stop at the Right Time: Once the temperature drops or the distillate flow slows significantly, turn off the heat. This indicates the process is complete.
Safety is paramount during distillation. Always work in a well-ventilated area and keep a fire extinguisher nearby. Never leave the equipment unattended while it’s running.
By following these steps, you’ll distill your spirits safely and effectively, ensuring a high-quality final product.
Safety and Maintenance Tips for Your Alcohol Distillery Kit
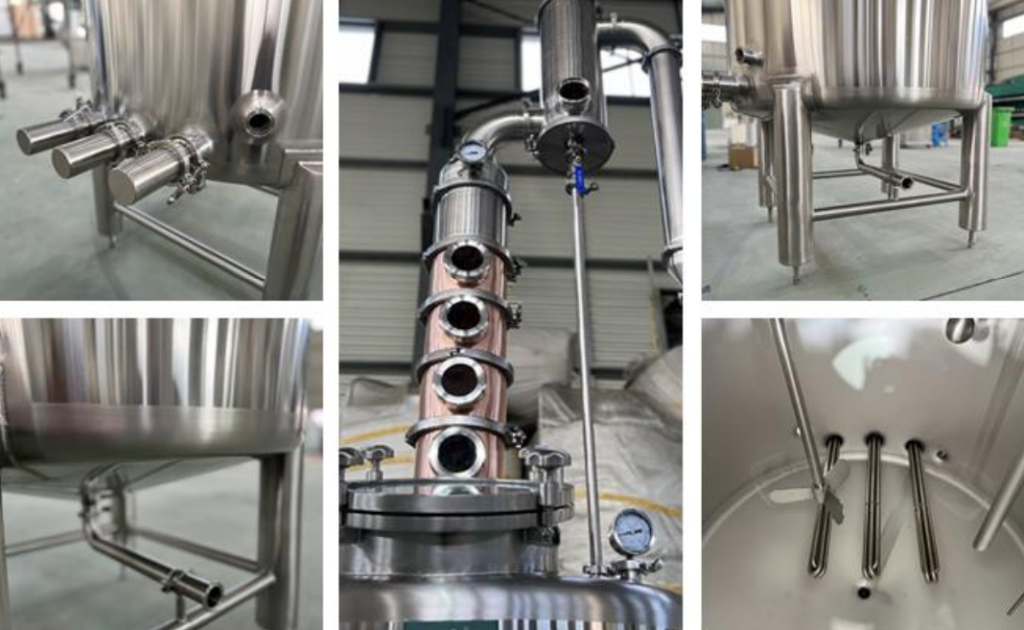
Safety and maintenance are the backbone of a successful and enjoyable distillation experience. By following essential precautions and caring for your equipment, you’ll ensure not only the quality of your spirits but also your safety and the longevity of your alcohol distillery kit.
Essential Safety Precautions During Distillation
Distillation involves heat, pressure, and flammable materials, so prioritizing safety is non-negotiable. Here’s how you can create a safe environment while using your distillery kit:
- Ensure Proper Ventilation: Always work in a well-ventilated area to prevent the buildup of alcohol vapors. These vapors can be hazardous if they accumulate, so good airflow is essential.
- Monitor Pressure Levels: Never allow pressure to build up in your still. Check that your kit includes safety features like pressure relief valves, and inspect them regularly to ensure they function correctly.
- Wear Protective Gear: Equip yourself with heat-resistant gloves, safety goggles, and an apron. These items protect you from burns, spills, and splashes during the process.
- Keep a Fire Extinguisher Nearby: Distillation involves flammable substances, so having a fire extinguisher within reach is a must. Make sure it’s rated for chemical or electrical fires.
- Avoid Distractions: Stay focused while distilling. Never leave your equipment unattended, as overheating or leaks can lead to accidents.
- Have an Emergency Plan: Prepare for unexpected situations. Keep a first aid kit on hand and know how to respond to spills, burns, or other emergencies.
“Safety during distillation isn’t optional—it’s essential. Proper preparation and vigilance can prevent accidents and ensure a smooth process.”
By following these precautions, you’ll create a safe and controlled environment for your distillation activities.
Cleaning and Storing Your Distillery Kit for Longevity
Proper maintenance of your alcohol distillery kit ensures it stays in excellent condition for years to come. Cleanliness and careful storage are key to preserving the quality of your equipment and the spirits you produce.
Cleaning Your Equipment
Cleaning your kit after every use prevents contamination and maintains the flavor of your spirits. Follow these steps to keep your equipment spotless:
- Disassemble the Kit: Take apart all components, including the boiler, condenser, and connecting tubes. This allows you to clean each part thoroughly.
- Wash with Warm Water: Use warm water and a food-safe cleaning solution to scrub away residue. Pay special attention to tight spaces and corners where buildup can occur.
- Sanitize the Components: After washing, sanitize your equipment to eliminate bacteria and other contaminants. This step is crucial for preventing infections in your wash.
- Dry Completely: Allow all parts to air dry or use a clean cloth to remove moisture. Storing damp equipment can lead to rust or mold.
“Sanitization isn’t just about cleanliness—it’s about preserving the integrity of your spirits. A clean kit produces better results.”
Storing Your Equipment
Storing your distillery kit properly protects it from damage and ensures it’s ready for your next use. Here’s how to store it effectively:
- Choose a Dry Location: Keep your kit in a cool, dry place to prevent rust and corrosion. Avoid areas with high humidity.
- Use Protective Covers: Cover your equipment with a clean cloth or plastic wrap to shield it from dust and debris.
- Inspect Before Storing: Check for any signs of wear or damage, such as cracks or loose fittings. Address these issues before putting your kit away.
- Organize Accessories: Store smaller tools like thermometers, hydrometers, and brushes in a designated container. This keeps everything organized and easy to find.
Regular cleaning and proper storage not only extend the life of your kit but also ensure that every batch of spirits you produce is of the highest quality.
“Taking care of your equipment is an investment in your craft. A well-maintained kit delivers consistent results and a safer distillation experience.”
By prioritizing safety and maintenance, you’ll enjoy a smoother, more rewarding distillation journey. Your alcohol distillery kit will remain a reliable tool for crafting exceptional spirits.
Common Mistakes to Avoid When Using an Alcohol Distillery Kit
Mistakes can happen, especially when you’re new to using an alcohol distillery kit. However, knowing what to avoid can save you time, effort, and frustration. Let’s dive into some common errors and how you can steer clear of them.
Errors During Setup and Assembly
Setting up your distillery kit might seem straightforward, but small mistakes can lead to big problems. Here are some common pitfalls to watch out for:
- Skipping the Leak Test: Many people forget to test their setup for leaks before starting. This can lead to wasted ingredients or even dangerous situations. Always run water through your system first to ensure everything is sealed properly.
- Improper Connections: Misaligned or loose connections between components can disrupt the distillation process. Double-check that all tubes and fittings are secure and correctly positioned.
- Overlooking the Thermometer: Some skip installing the thermometer or don’t place it correctly. Without accurate temperature readings, you risk overheating or underheating your mash.
“Its clear that bad stuff can happen to even the most experienced and you should never, ever, ever get complacent.”
This advice serves as a reminder to stay vigilant, even if you’ve set up your kit multiple times.
Taking your time during assembly and paying attention to detail will help you avoid these common setup errors.
Mistakes During the Distillation Process
The distillation process requires focus and precision. Even small distractions or oversights can lead to poor results or safety hazards. Here are some mistakes to avoid:
- Walking Away from the Still: Leaving your still unattended is one of the most dangerous mistakes you can make. “It seems MOST of the scary and most-dangerous incidents came from walking away from the still, not paying attention to the still, or having product too close to ignition sources when spillage happened.” Always stay nearby and monitor the process closely.
- Mixing Up Ingredients: Adding the wrong ingredient at the wrong time can ruin your batch. For example, one user shared how they accidentally added more neutral alcohol instead of water while making cuts. This kind of mix-up can affect the quality of your spirits.
- Ignoring Safety Precautions: Failing to ventilate the area or keeping flammable materials nearby can lead to accidents. Always prioritize safety by working in a well-ventilated space and keeping a fire extinguisher within reach.
Pro Tip: Stay organized during distillation. Label your jars and tools to avoid confusion, and keep distractions to a minimum.
By staying attentive and following safety guidelines, you’ll ensure a smoother and safer distillation process.
Long-Term Maintenance Errors
Neglecting your equipment after use can shorten its lifespan and impact the quality of your spirits. Here are some common maintenance mistakes to avoid:
- Delaying Cleaning: Procrastinating on cleaning your equipment can lead to stubborn residue buildup. One user shared, “After pulling my last batch of wash out of the fermenter, life happened and I figured I’d get to cleaning the fermenter the next day. That turned into a couple weeks… It took a pressure washer to get it clean.” Clean your equipment immediately after use to avoid this hassle.
- Skipping Inspections: Over time, wear and tear can affect your kit’s performance. Failing to inspect for cracks, leaks, or worn-out parts can lead to bigger problems down the line. Regularly check your equipment and replace damaged components.
- Improper Storage: Storing your kit in a damp or cluttered area can cause rust or damage. Always dry your equipment thoroughly and store it in a cool, dry place.
“Yeah this stuff is a tool killer… I’ve seen what you describe happen too, but I don’t think people took what I was saying seriously.”
This highlights the importance of taking maintenance seriously to protect your investment.
By cleaning, inspecting, and storing your kit properly, you’ll extend its lifespan and ensure consistent results with every batch.
Avoiding these common mistakes will make your distillation journey safer, more efficient, and far more enjoyable. Stay focused, take care of your equipment, and always prioritize safety.
Tips for Successful Distillation with Your Alcohol Distillery Kit
Experimenting with Ingredients and Recipes
Distilling your own spirits opens up a world of creativity. By experimenting with different ingredients and recipes, you can craft unique flavors that reflect your personal taste. This is where the art of distillation meets science, allowing you to tailor your creations to perfection.
Start by exploring various base ingredients. Grains like barley or corn are excellent for whiskey, while sugar or potatoes work well for vodka. Fruits such as apples or cherries can add a delightful twist to brandy. Each ingredient brings its own character to the final product, so don’t hesitate to try new combinations.
Once you’ve chosen your base, consider adding botanicals or spices. For example, juniper berries are essential for gin, but you can also experiment with citrus peels, cardamom, or lavender to create a signature blend. Keep notes on your experiments, including ingredient quantities and fermentation times. This helps you refine your recipes over time.
“Experimenting with ingredients allows you to combine science and creativity, resulting in spirits that are truly one-of-a-kind.”
Remember, the key to successful experimentation is balance. Too much of one ingredient can overpower the others, so start with small amounts and adjust gradually. Taste your mash during fermentation to get a sense of how the flavors are developing. This hands-on approach ensures your spirits turn out exactly as you envision.
Monitoring and Adjusting the Distillation Process
The distillation process is where your ingredients transform into high-quality spirits. To achieve the best results, you need to monitor and adjust the process carefully. This involves paying close attention to temperature, timing, and the separation of distillate fractions.
Temperature control is critical. Use the thermometer on your alcohol distillery kit to maintain the ideal heat level. For most spirits, the boiling point of alcohol is around 173°F (78°C). Keeping the temperature steady ensures the alcohol vaporizes without burning the mash. If the temperature fluctuates too much, it can affect the purity and flavor of your distillate.
As the distillation begins, focus on separating the fractions. The first portion, known as the foreshots, contains harmful compounds like methanol and should always be discarded. The next part, the heads, may have some usable alcohol but often carries harsh flavors. The hearts are the most desirable fraction, offering the purest and most flavorful alcohol. Finally, the tails contain heavier compounds that can add depth to your spirits but should be used sparingly.
“The distiller’s expertise lies in knowing when to make the cut. Tasting and smelling the distillate helps determine the perfect moment to collect the hearts.”
Adjustments may be necessary as you go. If the distillate tastes too harsh, lower the heat slightly. If the flow slows down too much, increase the temperature gradually. These small tweaks can make a big difference in the quality of your final product.
By experimenting with ingredients and closely monitoring the distillation process, you’ll gain the skills to produce exceptional spirits. Each batch is an opportunity to learn and improve, making your distillation journey both rewarding and enjoyable.
FAQ
Curious about using your alcohol distillery kit? Here are answers to some of the most common questions to help you get started confidently and safely.
1. Is it legal to distill alcohol at home?
The legality of home distillation depends on where you live. In the United States, federal law prohibits distilling alcohol for personal consumption without a permit, even if it’s for non-commercial use. However, some states have more lenient laws. Always check your local and federal regulations before starting. Compliance ensures you avoid legal trouble and enjoy your hobby responsibly.
“Distilling alcohol without proper permits can lead to fines or legal consequences. Always prioritize understanding the laws in your area.”
2. What safety precautions should I take while distilling?
Safety should always come first when distilling. Here are some key precautions:
- Work in a well-ventilated area to prevent vapor buildup.
- Never leave your equipment unattended during operation.
- Use heat-resistant gloves and safety goggles to protect yourself from burns or splashes.
- Keep a fire extinguisher nearby in case of emergencies.
- Regularly inspect your equipment for leaks or damage.
Methanol, a byproduct of distillation, is highly toxic. Discard the foreshots (the first portion of the distillate) to avoid consuming harmful compounds. Proper safety measures protect both you and the quality of your spirits.
3. How do I know if my spirits are safe to drink?
To ensure your spirits are safe:
- Discard the foreshots, as they contain methanol, which can cause serious health risks.
- Use a hydrometer to measure alcohol content accurately.
- Clean and sanitize your equipment thoroughly to prevent contamination.
- Avoid using distillation equipment made from materials like lead, which can leach into your spirits.
“Methanol poisoning is a serious risk. Always follow proper distillation practices to produce safe, high-quality spirits.”
4. What’s the difference between the foreshots, heads, hearts, and tails?
These terms refer to different fractions of the distillate:
- Foreshots: The first portion, containing methanol and other harmful compounds. Always discard this.
- Heads: The next fraction, which may contain some usable alcohol but often has harsh flavors.
- Hearts: The purest and most desirable part of the distillate. This is what you’ll want to keep for consumption.
- Tails: The final portion, containing heavier compounds. Some distillers save the tails for future batches or discard them.
Knowing when to make the cuts between these fractions is essential for producing high-quality spirits.
5. How long does the distillation process take?
The time required depends on your setup and the volume of mash you’re distilling. On average, the process can take anywhere from 2 to 6 hours. Rushing the process can compromise the quality of your spirits, so patience is key. Monitor the temperature and flow rate carefully to ensure optimal results.
6. Can I reuse leftover mash or wash?
Yes, you can reuse the leftover wash or tails in some cases. Many distillers add them to the next batch to extract any remaining alcohol. However, always ensure the leftover material is free from contamination and hasn’t spoiled. Reusing ingredients can enhance flavors and reduce waste.
7. What’s the best way to clean my distillery kit?
Cleaning your kit after every use is crucial. Follow these steps:
- Disassemble all components.
- Wash each part with warm water and a food-safe cleaning solution.
- Sanitize the equipment to eliminate bacteria or residue.
- Allow everything to dry completely before storing.
Proper cleaning prevents contamination and extends the life of your kit.
8. Why is my distillate cloudy?
Cloudy distillate usually indicates impurities or improper distillation. Common causes include:
- Overheating the mash.
- Poor separation of fractions.
- Contaminated equipment.
To fix this, clean your equipment thoroughly, monitor the temperature closely, and ensure proper cuts during distillation.
9. How do I store my spirits after distillation?
Store your spirits in clean, food-safe containers. Glass bottles with airtight seals work best. Keep them in a cool, dark place to preserve flavor and quality. If you’re aging your spirits, consider using oak barrels or wood chips to enhance the taste.
10. Can I experiment with flavors and ingredients?
Absolutely! Experimenting is one of the joys of distilling. Try different grains, fruits, or botanicals to create unique flavors. Keep detailed notes on your recipes and processes to refine your craft over time. Just remember to follow safety guidelines and start with small batches when trying something new.
“Distilling is both an art and a science. Experimentation allows you to create spirits that reflect your personal taste and creativity.”
These FAQs cover the basics, but every distiller’s journey is unique. Keep learning, stay curious, and enjoy the process of crafting your own spirits!
Setting up and using your alcohol distillery kit is more than just a process—it’s an adventure. You get to experiment, create, and enjoy spirits that reflect your personal taste. By following safety guidelines and embracing creativity, you ensure both a rewarding and responsible experience. The satisfaction of crafting high-quality, homemade spirits is unmatched. Every batch you make tells a story, one that’s uniquely yours. So, dive in, enjoy the journey, and let your distillery kit unlock a world of possibilities. Cheers to your success!

